Resources for Writers and Aspiring Authors
*I suggest viewing this page on a desktop
Subscribe to my Emails to get new updates sent to your inbox.
This is an area where I offer just about all of the research I’ve collected over the past several years. This could be a two-year college education in writing, publishing, and marketing all in one. But before you dive in and use these resources to publish your bestseller, you should know a few things.
Fun fact: I love helping others, and I especially love helping others who love to write like me. However, it’s important that every writer understands exactly what it means to publish a book, and what it will require. It will require you to do plenty of work on your own, and figure some things out like I did. But hey, if a mom of three like me can publish a book during the Covid 19 pandemic with the kids at home screaming and turning the house upside down, you can make it happen, too.
First things first. You should know that on average, I get about 1-5 private messages on social media/emails every week from someone who is “writing a book” or “would like to write a book but needs my help” or “would like my help setting up their publishing/author account.” Sometimes they’re from people I know, other times they’re from strangers. Remember before how I said I love to help others? That is true. But trying to help everyone who asks me to help them write their book, publish their book, give them information on the available publishing options, tell them how to market their book, etc. would be more than a full time job. And if I halted my own progress every time someone asked me to focus on their work, I would never have time to publish another book again.
Telling people that I don’t have time to help them write their book is the worst feeling for someone like me who loves to help others. So, that’s why I decided to create this page; so that I can help you without personally guiding you through the process myself. Because at the end of the day, I want you to have the best chance at this. I want you to publish an exceptional book, build your marketing platform, and hit a bestsellers list without breaking a sweat.
I’ve already learned this stuff, so hopefully you don’t have to learn it the hard way.
During the six years I spent having and raising my kids, I researched everything so that when I was ready to publish I could hit the ground running. Here are my notes and experiences on the different self publishing options that I found to be the best way to go about things. Let me be clear though: This education was harder to come by and work through than my college education was. This is six years of research and three years of publishing experience I’m handing over. But the truth is, your success as an author will completely depend on how badly you want this to work, and how much time you’re willing to put into this to make it your career.
I don’t know a lot of self published authors who managed to pull off hitting the #1 Bestselling spot in such a competitive category like “Christian Fiction” with their debut book, but I did it because of how much I planned ahead, and because I did loads of research. If you’re willing to do the work, you can do it, too. And that’s why I’m offering this page as a resource. So you can follow the steps I had success with (and avoid the ones that turned out to be a mistake for me) and write and publish a great book.
This list will get updated as I learn new things, so check back for new topics. The topics without links are ones I haven’t added to yet, but plan to.
Subscribe to my Emails to get new updates sent right to your inbox.
I don’t charge anything for this information but if you want to return the favour, you’re welcome to buy one of my books and leave a review on Amazon–that’s the best way you can support any author.
First General Things You Should Know
Common Misconceptions about Publishing
Writing:
Using and Finding Beta Readers
Preparing your Novel for Publication:
Self Publishing Versus Traditional Publishing
Ordering Proofs of your Paperbacks and Hardcovers
Publishing:
Publishing on IngramSpark
Publishing on Barnes and Noble
Getting Reviews/Early Review Copies
Audiobooks: ACX Guide
Making a Realistic Timeline and Publishing Plan (And Why This Matters So Much)
Marketing:
Your Marketing Plan (and why it’s the most important thing on your list)
Building Your Book Launch Team
Utilizing “Bookstagram” and “BookTok”
Instagram: Building Your Author Platform, and Connecting with the Author Community
Twitter: Building Your Author Platform, Which Hashtags to Use, and What #MSWL Is
Understanding how the Best Sellers Lists Work
How to use Canva for Social Media
Your Mailing List
What is Goodreads?
What is StoryOrigin and how do you use it?
Building Your Eternal Street Team
Building an Author Website
Business:
Registering Your Business/Publishing Imprint
How to Purchase the Copyright for Your Book
How to Scale Your Business to Generate an Income as an Author
Options for your Publishing Company/Imprint/Press
My Free Printable Builders
A few of the Books I’ve Published:
A Soul as Cold as Frost
Book #1 of The Winter Souls Series
Welcome to Fae Cafe (High Court of the Coffee Bean)
Enchanted Waters (Co-Author)
An anthology aiming to raise money for the charity Oceana
Enchanted Forests (Co-Author)
An anthology aiming to raise money for a conservation charity
Ice Cream: You Scream. We All Scream.
A 7-Day Devotional for Moms with Little Kids and Big Business Dreams
*I have published other books under pen names.
Quick Links:
Kindle Direct Publishing (Amazon)
Canadian Government LAC Site (For ISBNs)
My Author Social Platforms
Winter Woods Book Club Facebook Group (My Street Team)
My Email List (Subscribers)
My Author Profile on Instagram
Winter Publishing House (My Publishing Company/Imprint/Press)
Winter Publishing House Website
Winter Publishing House on Instagram
Plotting Your Novel
Hey there, Novel Writer. If you’re at this point, it means you must like to write. I dig that.
Plotting your novel is something you can do before you even start to write it. It’s basically grabbing a sheet of paper (or opening a fresh new white page on your laptop) and making a timeline of “scenes” that you want to take place in your book. This isn’t necessarily what you must do before writing a book though. There are some famous writers out there (Stephen King is one of them) who have actually said they don’t like to write novels by plotting them out first.
However, for many (probably most) of the authors whose books you love to read so much, they are most likely plotting out their books so they know exactly where their book (and their series) is headed.
Plotting your novel is basically an order of events that are supposed to take place in your story, along with details you want to include at each event. You can do this by chapter if you want to get really specific, or you can just sketch out what you want to happen by a certain point. It helps you to organize the structure of your book, and can often create a better flow of events.
I never used to plot out my stories. I used to write them Stephen King style because I liked to be just as surprised about what was going to happen next as anyone else. (Ha!) But now I’m addicted to plotting out my novels. I find that putting plot twists into the book, and foreshadowing, and adding mysterious elements that will later give the reader an “Aha!” moment, are all much easier if you’ve plotted out your story first. It’s also easier to keep writing from start to finish if you know where the book is going (and helps you to avoid getting writers’ block.)
Plotting your novel also makes it easier to follow some of the most common patterns in storytelling. You can split your book into 5 main sections: Exposition (setting the scene, giving us the universe and the characters–this is also where you want something to happen to your main character that will make the story “begin”) Rising Action (what happens that raises the stakes?) The Climax (the big event that your story has been leading up to, typically where your protagonist comes face-to-face with the worst case scenario) Falling Action (the immediate aftermath of the big event) and Resolution (where all the loose ends are tied up, and the reader gets their “happily ever after” scene if you’re a fairytale writer.)
This is just one way to do it, but you can also plot your book simply by penning down your own thoughts about what you want to happen in your story, and then using them for reference when you write your novel.
So grab a notebook and a multitude of colourful pens, sort out your book “scenes” by the order in which you want them to occur, and get writing.
*Also, check out Stephen King’s memoir “On Writing” for a great study on writing fiction novels.
Doing Research for Your Story
One of the nice things about writing in the fantasy genre is that I have more freedom when it comes to having to be accurate about certain kinds of information. For example, someone who is writing historical fiction needs to get all their facts right: dates, historical events, customs of the decade the setting of their book takes place in, etc. But when you’re writing a book entirely in a fantasy universe, you aren’t bound by the same chains of accurate historical facts.
There are some things that matter though. If you’re going to talk about a fantasy baker in a fantasy bakery of a fantasy world, you still don’t want to say that only flour plus water equals muffins.
A story can be made better by adding a few researched facts. Not only because it helps the reader to learn something new, but because frankly, it just makes you sound smart as a writer, and it shows that you put effort into creating your story. Readers appreciate that.
Picking a specific specialty for one of your characters can also enrich the story (like making your protagonist a baker, or a builder, or even the captain of a pirate ship) but you need to make sure you know enough about your chosen profession to ensure you’re giving the correct information–otherwise readers will call you on it, and they’ll likely criticize you in their reviews online if they catch you giving inaccurate information.
For Self-Help books, having sources for the information you give is important. You can talk about “what you’ve learned over the years” and be vague enough that you don’t have to provide sources, but any time you give a “fact” you need to say where you got it from. (Do you remember writing research essays in high school when you had to source all your facts? This is the same thing.) You can’t simply quote something you read online, or quote another person, or another persons’ book, without giving them the proper credit for it. This is copyright infringement and it’s illegal (and unfortunately many people don’t realize that.)
Just in general, it will only make the story better to have interesting, researched facts. Some authors do tons of research for their books before they even begin to write, and it shows. When I’m writing, I usually spend the most time researching where someone can get stabbed and still survive (haha!) But in A Soul as Cold as Frost, I also got specific when I mentioned different parts of the villain’s suit of armour. It made the pinnacle battle scene so much more interesting because I used words like “sabaton” and “gauntlet” instead of “hand” and “foot.” Before writing A Soul as Cold as Frost, I had no idea what the different parts of a suit of armour were.
Building Good Characters
Character building is one of my favourite things about writing a novel. I love to get into why a character acts the way he does, and I enjoy the process of creating someone interesting. When you’re writing a book, you might be just adding characters for the sake of adding them, but in my opinion, every character should be well thought out, and have something interesting about them. This makes reading the book a thousand times more enjoyable.
Basically, a character with no depth is BORING. So how do you add depth?
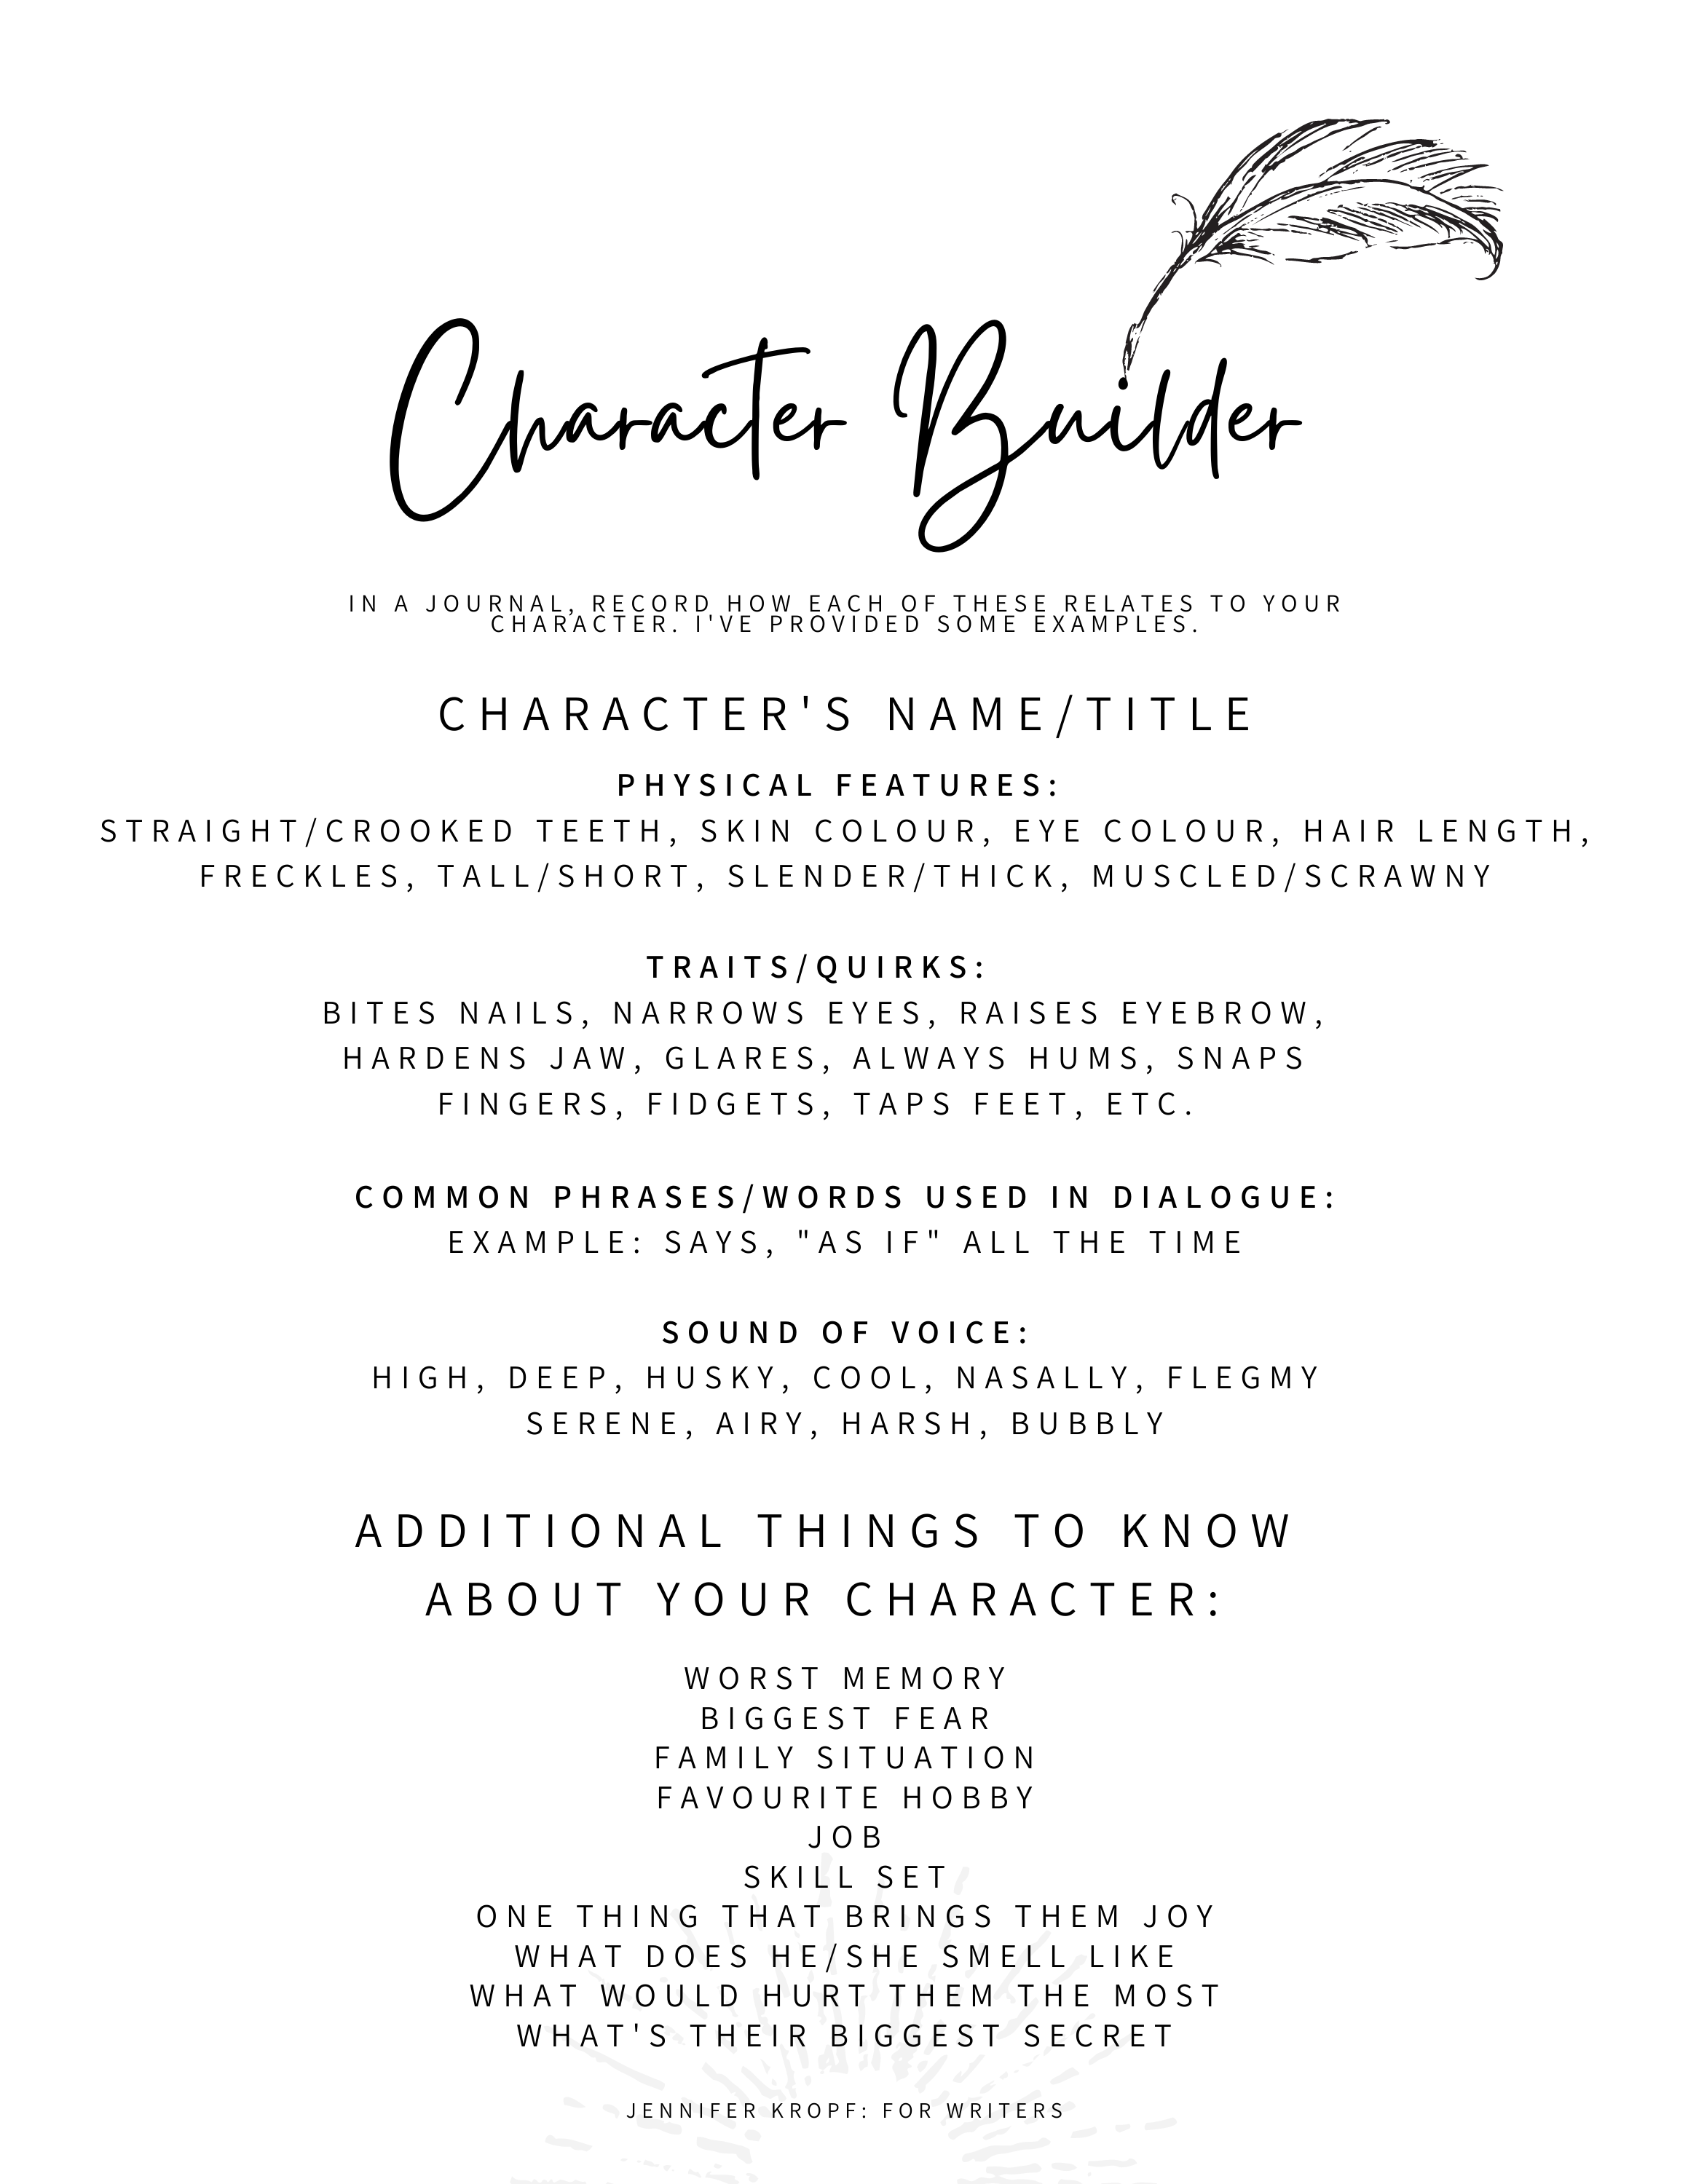
There are plenty of character builder sheets online that you can use, and I’ve even made my own that I often follow. (Find it Here.) But the bottom line is that you need to get to know your characters to add to them. It’s not enough to say, “Connor has brown eyes and black hair. He likes dogs.” If that’s all the reader knows about Connor, then they won’t care about Connor.
What about: Connor has husky, inset eyes, tanned skin from jogging in the sun, and a scar on his hands that he got from trying to rescue his dog from drowning in the river when he was eight years old. He left town for three years and never told anyone where he was. But don’t ask him about it–he won’t talk. He’s always whistling a tune I’ve never heard before but I can tell it means something to him.
HOW MUCH COOLER IS CONNOR NOW?
Adding backstory, fears, joys, habits/quirks, physical features other than just hair and eye colour, and even words/phrases a character uses frequently, etc. makes them more interesting and believable. In real life, people often repeat the same words in their speech out of habit. Another thing you can do is give your character special skills or disadvantages. I would advise doing all necessary research as you build. (If you decide you want your character to be a fantasy-world space pilot, it wouldn’t be a bad idea to have a basic understanding of how a common earth plane works.)
Fantasy Worldbuilding 101
Okay, I just love worldbuilding. I don’t even know why. I think it’s because I spent my childhood dreaming about visiting Narnia.
Worldbuilding doesn’t have to be complicated, but it does take some work to make your world interesting and immersive.
If you have a realm/magic kingdom/universe in your fantasy story, you’re going to want to start with the basics: What does the world look like? What does it smell like? Is it dangerous, magical, sandy, snowy? Is it filled with the ancient music of a thousand squealing frogs?
One thing that new writers sometimes do (that I used to do) is to just write and make up the world as they go. There really isn’t anything wrong with this, except that it becomes easy to lose track of things you said about the world in the beginning of your novel, and you run the risk of contradicting yourself in later pages.
This is why I always recommend writing down every detail of your world (even if you’re just making it up as you go. Pause for three seconds and take some notes-it’ll be worth it later.)
The bottom line is this: The more you plan out your world, the better it will be. That’s just a fact. There are plenty of different elements you can add to your world to make it more interesting: like common phrases, languages, traditions, wars, dangers, etc. If you like, you can use my Worldbuilding Worksheet to pen out your own world. Find it Here. This can be reused for every new world you build in your fantasy novels.
Common Misconceptions about Publishing
The first truth I have to share with you is this: Your book won’t become a sensation overnight.
Unfortunately, there are still writers out there who believe that if their book is good enough, they can be the Justin Biebers of the literary world. They think they’ll publish a book in secret without telling their friends and family, and a whole bunch of strangers will notice and magically buy it without being told to, and those people will start talking about it, and get their friends to buy it, and it will hit the #1 New York Times Bestsellers List all within a week.
This is what I call “hocus pocus, time to refocus.”
This isn’t a teen movie, and worldwide sensations don’t actually happen overnight. I think even Justin Bieber will tell you that finding success with zero effort doesn’t happen, and that making a dent in any industry requires a ton of hard work, and especially loads of pre-planning. (Seriously, watch any of Justin Bieber’s documentaries, and you’ll see.)
I’m not trying to burst your bubble, but you need to flush that fantasy down the toilet before its hurts your chances. The reason I’m telling you this is so that you’re not going to blast ahead and publish your book the moment you’re finished writing it, and then be disappointed that you only have 3 sales from your grandma and two best friends, and then five days later, no one is paying attention anymore to this book you put so much of your time and heart into writing. If you want success in publishing, you need to plan ahead. There’s no alternative. You won’t get sales and you won’t build up an author career if you don’t plan ahead. If you’ve finished writing your book, plan to publish it a year from now (that is a realistic timeline for your debut book since you’ll be learning how to do everything for the first time.) And if you read through the rest of my resources, you’ll understand why.
The second truth is: Writing Your Book Is 20% (or less) of the Work Involved in Publishing
Despite what many unpublished writers think, the first draft of your book will likely be the easiest part of your publishing journey. It’s step 1 of 10. (Or step 1 of 30, depending on how far your want to go with this.) Plenty of people want to publish a book “on the side” or “just for fun” and both of those reasons are great! I love hearing about people who made such a remarkable thing happen and didn’t give up even though they had other jobs and responsibilities. (This is how I got started.) In fact, I think starting out by “publishing on the side” is your best option even if you want to eventually be a full-time author, because you likely won’t start to see a realistic income for the first few years until you grow your audience, come up with a killer business plan that keeps readers coming back, and publish enough books to create a steady cash flow.
If you’re reading through my resource list, you can already see that there are many steps involved in publishing. I hope you’re ready to take on the challenge and get your book into the world! But the first thing you need to accept is that you should not rush this process, and if you want your book to sell, you’re going to need to plan ahead.
For Teens With Big Dreams of Being an Author
I started writing novels when I was a teenager. I used to write stories in my head before that (or I’d at least imagine fantasy characters in my head on long road trips up to North Bay to visit my grandparents every Christmas.) Back then all I wanted to do was shut my bedroom door, sit at my computer, and write.
I might be telling your story. If I am, and you are that girl (or guy) who is always thinking about a wild tale, even at family gatherings when you’re supposed to be socializing because you just can’t stop obsessing over your characters and what’s going to happen to them, then you, my friend, are meant to be a storyteller.
Let me tell you my story. (You’ll understand why when you get to the end.)
When I was applying for college, I wanted to do something with art. I used to be a painter (“used to” because I haven’t actually painted in years–shame on me.) I was originally planning to go to university to study visual arts. But I had an art teacher in high school named Mr. Varey who gave me the best advice I’ve ever received in my life, and though he didn’t know it at the time, his suggestion brought me to where I am today. He said, “Don’t go to university for visual arts. You can’t do much with that. If you love art, get into graphic arts.” So, I took that advice to heart and I applied for a few different programs local colleges. I had no idea what I wanted to do with my life, but art was what I was good at, and at the time, I was still keeping my story writing a secret.
I ended up getting into several programs, but I settled on a college that was close to home, not expensive, and would get me in front of a computer learning how to do graphic design. The program was called “Advertising” and it was a combination of both graphic design and marketing. The crazy thing is that I had NO IDEA how important the marketing side of my college education would become.
I spent my college years asking God, (yes, I’m a Christian) “Why am I here? I don’t want to work at a marketing firm. I don’t want to design ads for fast food chains or car companies.” In this program, I also took classes in business, entrepreneurship, event planning, fundraising, public speaking, and so many more. After I graduated, I was still asking why any of that stuff mattered. For the first few years after college, I didn’t use my education. I was a bridal consultant for three years, and I worked as an administrative assistant in the head office of a church denomination. But when I got pregnant with my son in 2014, childhood memories began to rise to the surface of my dad reading me and my siblings The Chronicles of Narnia before bed each night. I decided to sit down and write a Christmas story for my son that would show him the “Truth” of the season in a way that was magical and immersive. I imagined pulling this book off the shelf each year to re-read it to my children so that we could bond over books the same way I did with my family growing up.
That book is titled A Soul as Cold as Frost. It was my debut book, and it’s a #1 Best Seller. The reason I was able to hit a best seller’s list, design my own cover, format my own book, build up preorders, market it to the right readers, and do just about everything else required for publishing a book…
WAS BECAUSE I WENT TO SCHOOL FOR MARKETING AND GRAPHIC DESIGN.
If you want to be an author, I encourage you to take a few Creative Writing classes on the side to sharpen your craft, and I encourage you to start reading novels in the same genre you hope to publish in. You’ll learn the most about writing by studying other peoples’ writing style and story structure. However, writing is only a small part of this career. The two most valuable skills that I’ve used since setting out to publish, has been my marketing education (most of all!) and the fact that I was trained as a graphic designer.
Thank you, Mr. Varey.
Using and Finding Beta Readers
A “Beta Reader” is someone who will read your rough manuscript before you publish (preferably long before you publish) and give you their feedback. This is something you want to do BEFORE you send your manuscript to an editor. Your editor should be the last person you send your book to.
Let me tell you why Beta Readers are so important.
The last thing you want is to realize after you’ve already published that there’s a major plot hole in your story. Worst case scenario is you find out about it in the reviews which are posted publicly for everyone to see. Beta Readers are the people who will try to catch plot holes, major problems, or other things in your writing that might be annoying to a reader. (You do have annoying writing habits, trust me. Even if you think you don’t. You’ll quickly learn that you do as soon as other people start reading your work.)
Beta Readers are there to tell you what they like and what they don’t like, and what they think you should change. The first and most important thing to get your head around right off the bat, is that if they’re a good Beta Reader, they’ll be blunt and honest. So don’t get offended. (Wouldn’t you rather find out half your story sucks from a Beta Reader, instead of finding out it sucks from reviewers online after the book is already published and you can’t change it?) The second most important thing to get your head around in the beginning is that your book is NOT perfect, regardless of what you probably think. You might have gone through your manuscript a thousand times, and tweaked it to exactly how you love it. You might think it’s perfect when you send it off, but don’t fool yourself (and set yourself up for hurt) by thinking, “They won’t find anything I should change. They’re going to love it.” I hate being the bearer of yucky news, but there’s a 1000% chance you’re wrong. Beta Readers will find things they don’t like, and there will be parts that are close and dear to your heart that the betas might suggest you change or take out completely. If only one Beta Reader suggests a change, you might be okay to leave it if you hate the suggestion (though I almost always change it.) However, if two or more betas suggest the same change to your book, change it. Try not to panic; just think it through. If you really want your book to be the best it can be, you’ll do it.
There are places online you can find Beta Readers, or there are professional Beta Readers you can hire for a small fee. On Facebook, there are groups specifically for matching up authors with Beta Readers. You always have to be careful when handing off your manuscript to someone else, but after a while you’ll build up a repertoire with a handful of readers you trust, and you can keep using the same ones. Many authors will also “trade” beta reading for free (as in, you read another author’s manuscript and give them feedback, and in return that author will read yours and do the same.)
If you have a decent following of readers on social media, you can also do a “shout out” for Beta Readers. Some people use their own friends or family as Beta Readers, and that’s an okay option, but I suggest using at least a few strangers to go through it as well. People who don’t know you will be less worried about offending you, and if you want brutal honesty (I know I do!) then you need to get an unbiased opinion. Lucky for me, I have a brutally honest brother who has never let me down as a beta reader. Ha! (And that’s precisely why I keep going back to him.)
I suggest doing several rounds of Beta Readers. Send your manuscript to 2-6 people (keep in mind that half the Beta Readers you send your book to won’t actually finish it or send you notes. This is just how it is, so don’t be offended. You likely won’t ever hear from many of your Beta Readers again, but it doesn’t mean your book is bad; people just get busy with life.) Once some of those 2-6 get back to you with their thoughts, adjust your manuscript and then send your new version off to 2-6 more people. Adjust again, and if you’re still feeling like you need more advice, send it off to 2-6 more. I’d give each round of Beta Readers about a month to go through your work. (So yes, when planning your publishing timeline, give yourself at least 3 months dedicated solely to Beta Readers, and rewriting your book.)
Once again, if something a Beta Reader says bothers you, let it go. You asked for their opinion, remember? You do not have to apply every change a Beta Reader suggests–remember that this is YOUR story. But if someone is going to the trouble to mention something they don’t like about your book, I strongly suggest you at least ask yourself why they had that opinion.
When sending your manuscript to betas, I advise you to also send a short list of your main questions. This is because if you’re not specific, sometimes the Beta Reader won’t know what you want them to look for. I always ask my Beta Readers for their brutal honesty, along with their “overall impression,” and to tell me if they find any plot holes, and any areas that drag on or are “boring”. The specific editing (like misspelled words, grammar, etc.) can be taken care of by a professional editor later. At this early stage, you will likely be rewriting sections of your book, so I wouldn’t bother telling your betas to try and find your spelling mistakes and to judge your sentence structure.
Self-Publishing Versus Traditional Publishing
Many people think this is an “either/or” situation. It’s not. Let me tell you my story in regards to this:
Yes, I’m a hybrid author. That means I both self publish AND I have an agent (as of fall of 2023) for traditional publishing who’s managed to negotiate several foreign rights deals for my books in the traditional publishing market.
I’ve known some other great writers that have self published books, and then picked up an agent later because of their success as a self-pub author as well. When I first set out to publish my debut book series in 2020, it was right when the Covid 19 pandemic thundered through Canada. We were locked down for months and all my kids were home. I became an elementary school teacher overnight, and my writing was put on hold many times during the following years of repetitive lockdowns in Ontario. I knew that trying to work on anyone else’s schedule was unrealistic and I had to be able to move at my own pace, which was slow. Self publishing was the right choice, hands down.
BUT THEN…
Three years later, my self publishing business was booming, I’d built up a great readership on my own, and guess what, an amazing agent (one I could have only dreamed of sending a query letter to and landing) approached ME. I still remember the day I got that email from an agent at Triada US, and my jaw hit the floor. Normally to get an agent, it’s the other way around. You need to write a great query letter/book proposal, and you need to try and try and try a dozen times more until you’ve sharpened your letter enough and found someone interested enough in your book that they’ll pay attention to you.
I’d sent out probably dozens if not hundreds of query letters in my teen years, and frankly, I thank God every day that no one picked up my books back then and published them because they were outright terrible. I was still learning how to write, I hadn’t used beta readers, I hadn’t seen the horrid reviews of my writing style and had time to sharpen my craft and learn how to write books that people like. If one of the books I’d published back then had actually been published, I would have been the biggest laughing stock author in the universe. I’m positive.
SO, I’m a hybrid author. I self publish, and I now also write books we can pitch to larger traditional publishers.
Pros for Traditional Publishing: Agents have more access to the prestigious corners of the publishing industry. Good agents can get your book in with big name publishers, can negotiate foreign rights and/or film rights on your behalf, and they usually have a good list of contacts they’ve built up that are invaluable to an author. They also understand the industry and can guide you along and be a great voice for advice in your career as you go.
Cons for Traditional Publishing: Everything takes a long time and you have less control over what happens to your book. As I said before, you might be limited to publishing one book a year, maybe two. You won’t have say in what the cover of your book looks like, and you will no longer own the copyright to your book since it will be sold to the publisher. You won’t be able to work at your own pace; you’ll have deadlines. Also, if your book is the first book in a series and it doesn’t do well in sales, your series can be scrapped by the publisher and you can’t publish the rest of the books in the series when the publisher owns the copyright, so the rest of your story may never see the light of day. HOWEVER, I still think the pros outweigh the cons. It’s amazing to have people in your corner supporting your book with you and for you.
Pros for Self-Publishing: You can do what you want, when you want. You get to make all the choices: what your cover looks like, how the interior of the book will look, when you want to publish, etc. You can even make some changes to your manuscript after you publish it if you find a glaring grammatical error. You are in complete control and no one else owns the copyright to your book. You can also take advantage of Amazon’s “Kindle Unlimited” program if you plan to publish your ebook solely on Amazon KU, which means a whole new market of readers will be looking at your book, and you get paid per page read (this is better than book sales, in some cases.) And the best part about it: You can publish as many books a year as you want in a year!
Cons for Self-Publishing: It’s more work. This is because every single little thing required for publishing you have to do yourself. Sure, you can pay someone to design the cover, format the book, etc. but you’re still responsible for finding the cover designer, and hunting down a decent formatter. You have to deal with the indie publishing companies, and sometimes that’s brutal. You have to get your own ISBNs, and do all the research of “how to publish” yourself if you want to do it right. It’s also more difficult to get your book in front of loads of readers (not impossible, but more difficult.) Through lots of planning, I was able to create my own ARC team (early readers) and build up my street team, my email list, and do plenty of other things that helped my book to start showing up everywhere, but it wasn’t as easy as calling up a famous author and getting their endorsement (which is what some agents can do) or having access to the distribution a large traditional publisher has.
There are plenty of good reasons to choose either route. For a stay-at-home mom like me in 2020, self-publishing made sense with everything I had going on. Now, at this stage in my career, traditional publishing makes more sense, especially when I can add it on to my self publishing schedule.
I’ve heard of authors starting out in traditional publishing, and then going the self publishing route. I’ve heard of authors starting out as self pub authors, and then getting great traditional book deals or agents later (like me.) There’s no harm in starting one way, and ending another.
Re-Writes and Drafts
Maybe you already go through your own novels and self-edit. Good for you! You’re on your way to greatness.
Just in general, I try to go through my books around ten times (or more!) before they’re published. Once I write the first draft, I let it sit for about a month. This is SUCH an important part of the writing process. When I go back and look at my scrappy first draft, I see many of the mistakes I’ve left in the plot, and I catch plenty of my obnoxious writing habits. You won’t see these when you’re writing your first draft, and you might not see them if you finish your book, and then instantly start from the beginning to do self-edits. Don’t rush. It needs to sit a while.
Once I write my first draft, let it sit for at least a month or two, and go through with my first round of self-edits, I might start sending it to Beta Readers at this point if I’m confident in it (it’s unlikely though.) If there are any parts of the story that aren’t sitting well with me, then I’ll let it sit for another month, and go back to it again.
Yes, it’s a long process. And the first draft is the easy part. But you’ll be glad you dragged this precious manuscript of yours through so many drafts when it’s over.
Let me give you an easy chart of my personal Re-Writes and Drafts process for reference:
Plot the Story: I’ll start by making a timeline of everything that I want to happen (things are always added and changed later as I get new ideas.) I’ll include any short dialogue snippets, major events (big or small) in order, characteristics of the protagonist or supporting characters, and any other details I want to remember for the actual writing process. I’ll spend a few weeks just doing this and adding to it. I’m normally plotting a story while I’m also doing other things in my life because I find the best ideas come to me while I’m deep cleaning the house or scrubbing my 2-year-old’s slobber kisses off the living room windows. I actually keep my plotting in a separate word file so that I can refer back to it (and add to it) as I write the actual story. Sometimes the best ideas for the big finale of the story come while you’re only halfway through writing chapter two.
Write the First Draft: This is where I just write the story. It’s all about getting the story out of my head and “onto paper.” I try not to pause too much during this process. I don’t stop to research little things (unless they will majorly affect the story later if I find out I’m wrong) and I don’t worry too much about proper punctuation, sentence structure, and I try not to care if I’m rambling too much, because I know I’ll cut those parts out later. Just get the story written. (After this, I’ll let it sit for a month.)
Self-Edit/Rewrite #1: This is where I take out entire chapters, rewrite entire chapters, and reorganize sections. It’s also where I go through and add to sections that are bare/lacking. Basically, I’m gutting the whole book and practically rewriting it all, along with adding “meat to the bones” of the story. (I’ll let it sit for another month after this.)
Self-Edit/Rewrite #2: At this stage I re-read everything I changed before with fresh eyes to see if it all still makes sense. If things aren’t quite working, I gut it again. This is also when I go through and focus on sentence structure in my book; ensuring all the thoughts make sense and everything happens in the correct order. This is also when I do research on words I might have thrown in during the first draft but didn’t want to pause my writing to look up. (Afterward, I’ll let it sit for another month.)
Self-Edit/Rewrite #3: This is where I put my “reader” glasses on and try to absorb the story as if I’m reading it for the first time to catch any major plot holes, repetitive words, “filler words”, and I take out any and all extra words, sentences, or paragraphs that do not need to be there. Anything that doesn’t contribute to the story (just feels like rambling) gets taken out at this point. It’s like cutting off the fat from a good piece of steak. All I want left is the meat. (After this, I’ll send my manuscript to Beta Readers if I’m satisfied with the story, if not (or if I’ve changed too much during the last revision) I’ll let it sit for another month and do self-edits again.)
Rewrite Based on Beta Reader Feedback: This is where I’ll spend some time organizing all the notes I’ve received from beta readers, putting them in order, and going through my story point by point to apply the necessary changes. If I’ve changed so much of the story after incorporating all the feedback, I’ll let the manuscript sit for another few weeks and I might go through it again before I send it off to round 2 of beta readers. (During this process, I’m putting out feelers for more beta readers. After I’m done this revision stage, I’ll send it off to round 2 Beta Readers.)
Rewrite Based on 2nd Round of Beta Readers Feedback: This is the same process as above. At this point I’m probably not changing significant parts of the story, or the story’s structure, unless something major is pointed out. (After this, I send the manuscript to a content editor if I’m happy with it, if not go through the Beta Readers process again.)
Rewrite/Adjust Full Manuscript Based on Content Editor’s Suggestions: A Content Editor is very similar to what the beta readers do, but many times beta readers won’t give you complete structural feedback, because they’re just reading the story and telling you what they think. A Content Editor can be valuable if you’re uncertain about the structure of your story. (After this, I’ll send it back to the editor for a line-by-line edit.)
Rewrite/Adjust based on Line-by-Line Edit: Often times during a line-by-line edit, an editor will also be proofreading your story. At this point, you shouldn’t be changing any major parts/structure of your story, or adding a new character, or changing anything that will significantly alter your book. If an editor is doing a line-by-line, you should be ready to publish your story the way it is and are just adjusting your text to make it nicer to read. This can take a week or two to go through the editor’s notes because every single nitty-picky word and piece of grammar will be questioned, and you’ll likely have to stop and think about what’s been suggested every few words or lines. (After this, I send my manuscript back to the editor, or to a proofreader for the final and last check.)
Final Touch Ups: Fix all spelling and grammar errors in manuscript from Editor/Proofreader. This can be tedious because you might feel like you’ve seen your manuscript a thousand times by this point, but you’re ALMOST AT THE END. This will be your final stage before formatting, so it’s worth the tired eyes and spinning thoughts that focusing so closely on each word will bring. (After this, it’s time to format, then upload to publishing sites, and order a print proof.)
Read Through Print Proof: I don’t know if all authors do this, but I brew a coffee and I sit down with my paperback novel and I read through it with a stack of sticky notes to catch anything I may have missed. Even after an editor and I have gone through the manuscript a hundred times, I often still find a handful of things that I realize aren’t totally clear to a reader, a missing word here and there, or a missing comma, etc. (If I make a lot of changes, I’ll order a new proof and read through it again, and sometimes I’ll also get someone else to read through the proof to double check for errors.) At this point my brain is crying, because it’s so sick of reading the same story over and over, but it’s worth it. And unfortunately, even going through the book a million times, when it’s published, I guarantee someone out there will still find a spelling mistake/wrong word/missing word, etc. and tell you about it. Try not to fall into an exhausted heap on the floor when this happens. Just thank them (because they’re doing you a favour!) and go into your file (if you formatted the book yourself,) change the errors, and reupload it to your publisher sites.
The bottom line is that you shouldn’t rush. Don’t rush your story to publication, or it won’t be nearly as good as it can be. Always get loads of feedback (use plenty of Beta Readers) and have an undying appreciation for every single one of your editor’s suggestions, even if you don’t like what they have to say about certain parts of your book.
With my first two books, I gave myself a year, each. And even with a year, I still almost didn’t have my book ready on time. Now that I’ve been through this a handful of times, I’m much faster at this whole process, but if you’re just starting out, give yourself WAY more time than you think. Everything takes longer than you assume.
Working With an Editor
When I published my first book, the only thing I shelled out money for was an editor. Because of my skill-set (thank you, college) I was able to do just about everything else involved myself without having to hiring someone else. A professional editor was something that I could not skimp out on though. Yes, paying an editor can be costly, but it is worth it.
The reason you don’t want to forego proofreading is because there ARE going to be missing words/spelling mistakes/wrong word meanings and a whole bunch of other small issues in your manuscript if you have not hired an editor or proofreader to weed them out. Even if you’ve proofread your book yourself a hundred times, you need to realize that as the writer, you probably have most of your book memorized and are skimming over your mistakes without realizing it. I had no idea how many mistakes were in my first book–it was a huge eye-opening experience when I hired my editor to go through it. I really thought she wasn’t going to find any mistakes because I’d gone through it myself with a fine-tooth comb.
Unfortunately, even if your story is exceptional, people won’t be able to enjoy it if there are loads of grammar mistakes. One or two is okay (even some of the most popular books you know of might have one or two mistakes) but too many can make you look like a sloppy writer, and it can make you look like a lazy writer (I know, how horrifying for someone to think that after all your hard work!) And frankly, it can make your great story look…well, kind of stupid. How awful would it be for all your readers to have that opinion of you right off the bat? Yikes!
My editor is my favourite person. Her name is Melissa Cole, and I’m happy to provide you with her website if you’d like to hire her yourself. She specializes in editing for indie authors (self-published authors) and I’ve been working with her for years. She also has a great rate, and a great attitude. Some editors out there just aren’t kind and won’t care about your book (and might even be bad proofreaders, eeek!) But mine comes highly recommended. Click Here to visit her Website.
You’ll likely need to book your editor in advance so they can pencil you into their schedule. I would give any editor you use a month to go through your manuscript (some will require more time than that) and you had better make sure you have your manuscript ready to send to them by the date you have them booked for, or you’ll miss your spot and you’ll either have to find another editor, or you’ll have to wait a few more months until that editor finishes with whatever books they had scheduled after yours and can find some free space in their schedule.
Formatting Your Book
Formatting the interior of your paperback, or formatting your ebook to meet the epub/mobi requirements can be frustrating for someone trying to do it on their own if they have no graphic design experience. I would always suggest getting a professional to format your books if you’re not familiar with basic design programs on computers, and especially if you know you don’t have an artistic eye.
That being said…
I formatted my book myself, and I didn’t do it in any fancy program like InDesign (the industry standard) or Vellum, Scrivener, etc. I didn’t want to put out the money to purchase new software I’d then have to spend time learning how to use. When I was getting my debut book ready for publication, I was really pressed for time, and I had told myself I wasn’t going to shell out loads of money for this–I wanted to do as much work as I could myself so that: a) I’d know how to do it for all future books and b) Every penny that rolled in from book sales would be profit and wouldn’t just go toward trying to pay back the funds I had to put out for the books. This was a personal choice, but it’s not the typical one for authors. Most authors hire things like formatting and cover design out.
But that’s why I formatted my book (and now I always format my books) in good old Microsoft Word.
I already had Microsoft Word on my computer–it’s the program I’ve used to write my books in for the past fifteen years. Call me old. Go ahead. But I’m the sort of person who doesn’t care for brand labels; I care the most about what works the best for me and Word has always been the easiest program (in my opinion) to write books in.
I took flack for this from a handful of “professional graphic designers” who didn’t realize I was also a trained graphic designer. I’ve taken flack for designing my book cover in Canva too. In a Facebook Group, I once asked a question about one of IngramSpark’s uploading requirements for hardcovers and when I explained that I’d exported my cover file from Canva, one of these designers glanced down at me from his virtual pedestal and said, “Well I don’t use programs like that, because I’m a professional.”
Thanks, you turd. So am I.
The point is that it really doesn’t matter which program you format your book in, as long as it looks great in the end. Now that I’ve gotten the hang of formatting in Microsoft Word, it’s extremely easy for me to format an entire 110,000 word book in hours. I put graphics on the chapter titles, I include title pages throughout, and I’ve gotten tons of compliments on my work, and I’ve had people ask me who I used to do my formatting, or “What program did you use?” And so I tell them. Microsoft Word, baby.
Places to hire book formatters:
Fiverr (There are lots of formatters for hire on here and you can also hire designers if you’re looking for a cover designer.)
Upwork (Upwork is fairly easy to use and you can also hire designers here if you’re looking for a cover designer)
Reedsy
Or, you can do the old fashioned “shout out” for takers on social media if you have a decent following of other authors. Sometimes people who follow you will see your post and tag a good formatter they’ve worked with.
Things to know about formatting yourself in Word:
You can download a template on This Amazon KDP Page to make this a thousand times easier. You just put in the size of your book (as in, how many inches tall you want it to be, and how many inches wide. I think the most common measurements in publishing are 6×9 inches) and you can download a Word file that is already that size, and already has the pages positioned to compensate for the binding. It should already have your page numbers set up, and you can add your name and book title into the top margins.
An important thing to always keep in mind (that will make things easier as you go) is that the odd page numbers will always be on the RIGHT side when your book is open, and the even page numbers will always be on the LEFT.
One thing Amazon doesn’t explain how to do is to add additional chapters if your book has more chapters than what the template provides. You’ll want to add a “Section Break” (not a Page Break) at the end of your last chapter to start a new chapter, otherwise you’ll end up with your margin text on your chapter title pages.
To format an ebook, make sure you remove any blank pages you have in your file that you added for your paperback. To create a Table of Contents at the beginning of your ebook, follow these instructions on the Amazon KDP Site. They also have a list of everything you’ll need to ensure your ebook meets the publishing requirements.
I suggest writing down all of your notes as you learn these steps (I did) so that you can reference back to them the next time you do this, but also because there will likely be slight errors when you preview your completed books during the publishing process that you’ll have to go back and change.
If you’re a designer and you want to take on the task of learning how to utilize Word for your book formatting, just remember that you’ll want to have your final file saved as a PDF before you upload it to your publisher sites, and I do not recommend simply saving your Word file as a PDF in Word because it throws off the formatting. You’ll have to go to a “Word to PDF” converter site, such as Free PDF Convert and convert the Word file to a PDF that way.
(Amazon actually allows you to upload the straight Word file, but DON’T do this because it rarely looks right. Always convert to PDF and upload your PDF file for your paperbacks and hardcovers.)
Getting a Cover for your Book
As I mentioned in my Formatting section, I designed the cover of my book myself. But if you aren’t a graphic designer–or if you have zero experience designing things even for fun–I wouldn’t suggest trying to do this yourself. Not only could you get frustrated with your cover not looking as nice as you want it to, you will likely get majorly put out of sorts when you try to upload your cover file and it’s not the exact size for your book, or it doesn’t meet the cover requirements, or you didn’t check the “bleed” box with your bleeding images, because you didn’t know what that meant. (Have I convinced you yet?)
This is the same list from the Formatting section because on these sites, you can hire book cover designers too.
Fiverr
Upwork
Reedsy
If you’re active in the author community (If you’re at the point of needing a book cover, you should definitely already be active in the author community on social media) you can usually ask around and many of them will recommend great cover designers.
However, if you want to/are able to design the cover yourself, you can download a cover template off of the Amazon KDP site to start with. This should be done after your book is already formatted. The reason for this is because in order to get a cover template, you’re going to need to have the exact page count of your book in order for the template to generate the right size.
Once you have your template, you can open it in your design software. That yellow box on the bottom left is where your barcode will go, so make sure you don’t put any images or text in that area that you want people to see or read because it’ll get covered up. Even if you spend a million years making the best cover ever, you’ll likely have to tweak it a bit to get it everything in the proper place once you upload it to the publishing site and look at it in the previewer.
Now let me talk to you about Canva.
I decided to upgrade to a paid Canva Pro subscription because I use Canva to design my book covers. (Do you hear those cackling hyenas laughing in the distance? Those are the “designer professionals” who don’t approve of my choice.) The reason I use Canva, even though I was fully trained to use the Adobe Suite in college, is because unlike those designers who apparently have loads of money to throw around, I couldn’t afford the Adobe Creative Suite in the beginning. But now that I’ve been using Canva, I wouldn’t trade it for anything. My reason is this: Canva is SO EASY to use in comparison to other design software, even for someone who’s trained as a designer. But the biggest reason I prefer Canva is because it’s remarkable for social media. And as someone who not only wants to design book covers, but also wants to market my books once they’re published, Canva is ideal. I use it almost every day for my Instagram posts because it’s so quick that I can easily whip up a beautiful social media graphic from my phone in seconds. (I’m done making my pretty graphic with Canva in the time that it would take Adobe to even load up and open on my desktop computer.)
From a graphic design stand point, Adobe is the industry standard, without a doubt. You can do more with it, you have more options, and it’s truly an amazing program. If designing book covers is all I was doing, I would prefer Adobe Illustrator and Photoshop. But I’m not just designing book covers, I’m doing fifty other things on any given week for marketing purposes.
From a marketing stand point, Canva Pro wins.
The only downsides to Canva is:
1) You can’t open a PDF already made. You have to create a new project with custom dimensions and then upload your PDF and drop it on top of your artwork. This is especially annoying because the Amazon KDP templates for book covers don’t have the exact measurement written on the file (the ones they give aren’t exact for putting in the dimensions on Canva) so more often than not I have to adjust the paperback/hardcover covers to the correct size later, after I’ve tried to upload it onto KDP or Barnes and Noble and they tell me what the measurements are supposed to be.
2) Canva is more like Illustrator than Photoshop, so using brushes and the band-aid tool to edit tiny photo details aren’t as easy as clicking a button. Some photoshop-type things are still possible if you can get creative. The bright side is that Canva is adding new features all the time, so I think it won’t be long before some of those common photoshop tools are available in Canva as well.
As far as I can tell, these are Canva’s only flaws when it comes to using it for an author career.
Canva does offer a free version, but I wouldn’t recommend using their free version for your book cover because their guidelines indicate that if you’re using the free version, you can’t use their Canva Pro graphics (even if you purchased them for the individual one-time use) in more than one design. Some of their other guidelines for free usage are a bit confusing, so just in general if you want to use Canva I’d upgrade to the Pro version. It’s worth the money (and a fraction of the cost of Adobe software.)
When uploading your cover to your publishing site(s) you’ll need to have your paperback or hardcover saved as a PDF (in Canva it’s the “PDF Print” option.) Your ebook cover can be a jpeg.
Ordering Proofs of your Paperbacks and Hardcovers
This will be a short section but I’ve had people ask me questions about this before so I figured I should address it. When you publish, you will be given an “e-proof” of your book automatically, which is basically an online file that shows you what your book will look like. (If you’re using IngramSpark, don’t panic if you see hairline marks (lines on your cover that look like threads) because those won’t appear on your actual book.)
To order physical proofs of your paperbacks or hardcovers, you’ll need to basically have everything finished for your book. This should be your last step before you publish. One very important thing to note about proofs: They can take several weeks, even sometimes well over a month, to arrive in the mail. I didn’t know this when I was first starting out, and my IngramSpark proof took over a month to show up. Even my Amazon proof took longer than expected, because I didn’t realize that the proofs came from the US.
IngramSpark only prints on certain days of the month, so if you order the day AFTER their print day, you’ll be waiting a week or two (possibly even three?) before they even print it, let alone put it in the mail and ship it to you. Being in Canada, I was not prepared for the month-long wait. One of the plus sides to ordering proofs from IngramSpark is that they don’t put any kind of “proof” watermark on your book, so you can still give it as a gift or keep it as your personal copy, which is nice.
Amazon is faster because they’ll print your proof almost right away, but keep in mind that your proof is coming from the US and will still take a while to show up if you’re in Canada. When it arrives, it’ll have a nice, big, fat, juicy watermark ribbon across the front of your book saying “Not For Resale” in case you magically forgot that it was a proof. So the money you paid for your proof, and for shipping your proof from the US, kind of goes down the drain because you can’t gift someone a book (or even send it to an ARC reader) that looks like that.
Barnes and Noble Press won’t ship proofs to Canada.
How to Get an ISBN
An ISBN is a number that represents a book. Every book that’s published has one. And every different format that you publish your book in will need its own ISBN. (So, if you publish your book as an ebook and as a paperback, each of those will need a separate ISBN because they’re considered two different books. You’ll also need a third ISBN if you publish a hardcover.)
Getting an ISBN differs by country. I’m not sure how it’s done in the US/UK or anywhere else, but I know that they typically cost money to purchase. Luckily, in Canada, the Canadian government gives out ISBNs for free as a way to encourage authors to publish books. You can create an ISBN Canada Account with the Library and Archives Canada government website HERE. (Don’t forget to write down your login info because you’ll need it again later when you want more ISBNs for future books) Once your account is set up, you can click “Manage Logbook” on the taskbar. Once there, you can click on the link “Assign New ISBN.”
Another thing to note is that Amazon (Kindle Direct Publishing) will give you an ISBN for free if you’re publishing your book exclusively on Amazon KDP. This is an easy option for any indie author who only plans to publish on Amazon, but keep in mind that if you change your mind later, you won’t be able to publish your book on another platform. Personally I think accepting a free ISBN from Amazon limits your options. I would suggest getting a free ISBN from the Canadian Government website and using that one when you publish on Amazon KDP, even if you’re only publishing on Amazon for now.
The ISBN that you get for your book is the same one that will STAY with your book on every new platform you publish it on. So if you publish your ebook on Amazon KDP first and then decide to also publish it on Lulu, BookBaby, Barnes and Noble Press, or IngramSpark, etc. you will use the same ISBN when you are filling in your book details.
Publishing on Amazon
Amazon (Kindle Direct Publishing) is the biggest self-publishing platform out there. Not only are they the easiest company to publish with in my opinion, they’re also where the largest amount of readers purchase their books, worldwide. Amazon has everything laid out on their website: all the instructions on how to publish are right there. This is always the first platform I recommend to writers wanting to publish their first book.
Whether you want to publish a novel or a children’s picture book, Amazon has got you covered. With options for ebooks, paperbacks, hardcovers (this is new!) and even audiobooks on their ACX site, Amazon can do it all. They even have an amazing publishing option for ebooks called Kindle Unlimited. If you plan to publish only on Amazon, you can enroll your ebooks into Kindle Unlimited which gets your book in front of loads of readers. In KU, you get paid per page read instead of having to sell your whole book. It’s an excellent program, however, if you enroll your ebook in KU, you are not legally allowed to publish it anywhere else (this is stated in their contract.) You can publish your ebook with KU and then take it back out again, but it’s important to know that it takes several months for your book to come off KU, and you cannot publish your ebook until it’s off. You also need to be careful about giving your book away for free while it’s in KU (even to reviewers) as this can breach your KU contract.
Enough about KU though, let’s talk about the basics of how to publish a book on Amazon.
To start, you’ll need to create an account on Amazon KDP. Once you do that, you can click on the “Bookshelf” tab to start setting up your first title. You can actually set up your ebook for preorder up to six months (I believe) before you plan to launch it. If you’re doing this, my advice is that you make sure you’re FAR along in the writing/editing process of your book so you don’t miss your upload deadline for your completed ebook. (If you have to cancel your preorder because you can’t meet the deadline, you get in trouble for it. I think Amazon restricts you from being able to publish another ebook for a YEAR. Yikes!)
You’ll need to have your ISBN ready, you’ll need to have chosen your final book title (this can’t be changed later) and you’ll need to have come up with a short book blurb/description for your book listing page. (Your book description should be the sort of short paragraph/pitch you’d find on the back of a book in a bookstore.) You’ll be asked for the “imprint” which is essentially your “publishing company” if you decided to create your own (I’ll talk more about this in my Making a Publishing Company/Imprint section.) Having this is totally optional (in other words, if you didn’t register a business with the Canadian Government in advance, this isn’t a big deal if you’re only publishing on Amazon because Amazon doesn’t require you to have a publisher the same way IngramSpark does. Just leave the “imprint” question blank.)
IMPORTANT: If you plan to publish your ebook elsewhere, make sure you do not check the box for Kindle Unlimited. (I would double check that this box has not been selected before you move on.) If your book is enrolled in KU, you aren’t legally allowed to publish your ebook anywhere else.
You’ll have to pick keywords when setting up your title on Amazon. You can pick up to five in your book details. Keywords are words that will help someone find your book when they’re searching on Amazon’s site. You can’t use the title of someone else’s book as one of your keywords, even if their book is similar to yours (I’m pretty sure you’ll get a virtual “slap on the wrist” for that) and you shouldn’t use words that are already in your book title or book description, because those words will already be helping people to find your book. Don’t be too general with your keywords though, because if you pick ones that are too popular, your book will get lost amidst the thousands of others with the same popular keywords. Try to be specific if you can. (For example: “Tragedy” would be too general in non-fiction, but “Miscarriage” would be specific.)
You’ll also have to pick your book categories. I think you can pick two categories for your book, but even after you pick them, Amazon automatically puts your book into other categories based off the reviews you get, your description, etc. For example, I put Book #2 of The Winter Souls Series in the “Christian Fantasy” category, but Amazon also added it to the “Christian Poetry” category automatically because there are poems in my books that people referred to in their reviews of Book #1 of the same series.
You can’t do preorders on paperbacks or hardcovers with Amazon, only ebooks. (It’s one of the downsides to publishing exclusively on Amazon, and it’s the reason I opted to publish on both Amazon and IngramSpark. If you publish your paperback on IngramSpark, you can have it available for preorder on Amazon through IngramSpark. You can learn more about this in my Publishing on IngramSpark section.)
After you get through the “Details” page, you’ll get to the “Content” page where you can upload your manuscript file (in PDF preferably, but Amazon will also accept Word files for paperbacks–though I wouldn’t recommend it because they don’t always look right. When saving your Word file as a PDF, DO NOT save it as a PDF directly in Word. Go to an alternative “Word to PDF” Converter site, like Adobe.) You’ll also have to upload your cover file–also in a PDF format.
Once you have everything uploaded, you’ll have the option to “Preview” how it will look. Look over your book carefully. This is exactly how it will look published, so if the cover is way out of place, it needs to be changed. Make sure your title pages, etc. are showing up on the right sides.
You’ll then need to set your prices. This is fairly straightforward. If you choose to receive 70% of the profits, you cannot make the price of your ebook less than $2.99 CAD. If you want to make your ebook 99c, you’ll have to select 35%. Amazon will tell you this as you go so it’s not confusing.
Before you publish your paperback on Amazon, you’ll want to order a proof copy. You can do this at the end of your title setup. Be careful not to hit the wrong button and accidentally publish your paperback early because it creates a world of problems (I accidentally did this, and I wouldn’t wish it upon my worst enemy.) I recommend setting up your paperback title several months before you plan to publish it so you have time to order a proof and make sure it looks right. Then, I’d plan to publish your paperback 1-2 days before your launch date so that it actually shows up as “available” on Amazon in time for your book launch, because it takes up to 72 hours to appear as available on Amazon.ca once you hit publish.
The benefits of publishing on Amazon: They’re the biggest booksellers out there. They’re the easiest platform to publish on. Their turnaround time is the best I’ve found (72 hours total for a title to become live after you publish–many other self-pub companies can take weeks.) And the biggest benefit of all is that if you’re publishing exclusively on Amazon, you can enroll your ebook in Kindle Unlimited.
Amazon is my #1 choice for publishing. This is the route I recommend if you’re planning to publish your first book.
Publishing on Barnes and Noble
I’ve only tested a few books on Barnes and Noble, and the main things I’ve noticed are:
- Publishing takes a long time in comparison to Amazon and IngramSpark (So when you actually finish inputting all your book details, upload your book PDFs, and click “Publish”.) When I publish a book on Amazon, it’s usually live by the next day or two (it can take up to 72 hours but usually it’s faster.) When I published on B&N, it took weeks. I’m not sure if it was because my files needed more time to be approved, or if this is the standard time it takes for everyone, but I would highly recommend planning for it to take a few weeks when plotting out your publishing timeline so you don’t end up weeks behind schedule. (That being said, you also don’t want to hit “Publish” and have it go live 2 weeks before your book is supposed to be launched, so I recommend putting it up for preorder way ahead of time so it clears, and having your launch date set so it’s available automatically for your book release.)
- Getting your vendor approved takes a very long time. I might not be completely accurate here, but I think my vendor approval (my publishing company/bank account setup) took about a month to clear. I believe you need a publishing imprint (publisher) to publish on B&N, so this might not be an option if you’re planning to just publish under your personal name (like you can on Amazon.)
- The Barnes and Noble title set up is easy. I find it easier than IngramSpark, but possibly not quite as easy as Amazon (nothing is as easy as Amazon.) HOWEVER, my cover PDF did not get approved because the fonts weren’t embedded (apparently) and Amazon had no trouble approving and printing a proof of the exact same PDF. I had to create a separate cover for B&N to get it to accept it, with typically universally accepted “Sans” fonts instead of my cool original ones. (As a designer that irks me a little but I decided to shrug it off.)
- You can put paperbacks and hardcovers up for preorder (you can’t do that on Amazon.) So that’s a mega plus for B&N.
- Barnes and Noble are the biggest bookstore chain in the US. Having your books on their website is fantastic for you as an author, however, don’t mistake your books being available on their website for also being available in their brick-and-mortar stores. Typically they don’t put their self-published works in their physical bookstores. (Though, there are exceptions if you can present them with a convincing media kit.)
- Barnes and Noble won’t ship proof copies to Canada. (How typical. Canadian shipping costs make us Canadians lose again.) If you already have a proof of the exact same paperback from Amazon or Ingram, you might be okay to trust that when you hit “Publish” your book will look the same. Because there’s no way to get a proof copy of your book here unless you have a US Postal address and are willing to drive down and get it.
Getting Reviews/Early Review Copies
Copies of your book that you send out in advance to readers to review are called “ARCs.”
The reason sending out free, early copies of your book is so important is because building up reviews for your book helps to boost preorder sales (if your book is up for preorder) and it gets people excited about buying your book. The benefits of building up preorder sales is that when your book is launched, all those preorders count as sales on your launch day, and the more sales on your launch day, the better your chances of hitting a Best Sellers’ list.
Unfortunately Amazon doesn’t allow reviews before a book is published (why, Amazon, why?) but you can start to build up reviews on Goodreads, and some reviewers will post their reviews on their social media platforms or their book blogs. This just builds up hype for your book release, and it gets other readers looking your way and thinking about buying your book.
Even after you publish your book, you can hand out free copies in exchange for reviews (as long a your ebook isn’t enrolled in Kindle Unlimited) to start to build up your reviews on Amazon. The reason having reviews on Amazon is so important is because once you hit 25 reviews, your book’s visibility on Amazon goes up (so it starts appearing as a suggestion to more readers who are scrolling on Amazon’s website.) Once you hit 50 reviews, your visibly goes way up again.
I don’t suggest mailing people physical copies of your book as Review Copies. Because the Canadian Postal service is its own organized crime, the cost of shipping in Canada is horrifying. It’ll cost you more to ship your book to some provinces than the cost of what your actual book retails for. So be very careful to not make promises to people that you’re going to ship them a book for them to leave you a review. (Once you begin building up your author platforms on social media, you’ll start getting all kinds of messages from random reviewers all over the world asking you to mail them a physical book in exchange for their review. Don’t agree to anything.) My debut book, A Soul as Cold as Frost, retailed on Amazon and Indigo for $16.99 when it was published. But when I went to ship that book to someone in British Columbia, I was told it would cost me $18.49 to ship it. So, even getting the book at printing cost–which was around $10 because I got smart and hired a local printing company to print my author copies–I was still shelling out $28.49 total to send one person a book. It’s considerably more than that to ship a book to parts of the US.
There’s no reason you shouldn’t be able to build up an excellent ARC team by giving out free ebooks. Ebooks are amazing for this. If you use a platform like StoryOrigin or BookFunnel, you can easily distribute early ebooks to interested readers to build up reviews. I don’t recommend sending an epub file to strangers in an email, even if they look trustworthy. That’s how your work gets stolen.
To get a group of ARC readers, do a call out on social media offering to give away “X” number of copies of your book to reviewers, and ask any interested readers to send you a private message. Or cold call people individually, but please, PLEASE don’t be tacky about it. Remember to be kind, and to never be pushy. You’re asking someone for a favour–one that is time consuming. Remember that.
There are also groups on Facebook you can find that connect authors with ARC readers. This is a good place to start. Just search for “Book Reviewers” in the Facebook search bar.
And, if you’ve started building relationships with other authors, often you can read each other’s books and leave reviews if you have the time to do that. But do not “trade reviews” with other authors by leaving fake reviews about liking their book on Amazon without actually reading the books, because if Amazon catches you doing this, you’ll get in trouble for it. Amazon also won’t allow you to pay for reviews, so be wary of people who send you private messages on social media (you will get those too) offering to review your book for a fee.
I would start to gather your list of early reviewers as early as six months before you publish your book. Keep a list of names and don’t forget to ask them for their email address when they agree to review your book. Give them a date of when you plan to send out your ARC copies and when you want your reviews up by. Then, when your ebook is ready, send it off to your list and don’t forget to thank them! Then you can sit back and watch the reviews roll in.
Keep in mind that a lot of those reviewers you sent a free book to won’t review your book. This likely isn’t because they’re trying to rip you off, or because they hated your book. Many people forget, or get busy with life and don’t finish reading it. If you send out 100 ARC copies of your book, you can expect to only get around 30 reviews in the end, maybe more if you’re lucky.
And lastly, don’t be disappointed if everyone in your life doesn’t leave you a review! Many new self-pub/indie authors expect that everyone they know will jump aboard and leave reviews. But the average person in your life doesn’t realize how important reviews are and might not think to leave you one, even after you ask. Try to remember that most of these people have already supported you by buying your book! They’ve done a great thing for you, so be as grateful as ever.
Making a Realistic Timeline and Publishing Plan
If you have just finished writing that beautiful story of yours, congratulations! Finishing a book takes some real work. However, don’t race to the publishing sites just yet. Let me show you what my timeline looked like for 2020 when I published A Soul as Cold as Frost (some things I’ve tweaked to how I wished I’d done it, based off everything I know now.) Included in this timeline is a list of many of the things you should do (some of them LONG before you publish.) This is just a basic guide, but the takeaway here is that everything takes longer than you think in the publishing industry. If you just finished writing your book, I would suggest planning to publish it a year from now (or more.) Look at my timeline to see why.
Timeline For A Soul as Cold as Frost: Publishing Date: November 3rd, 2020
January: I announced on my social media I was going to publish a book
Because I had been doing research prior to this, I knew publishing was going to take a long time. I also knew that building up my social media platforms was going to take time, and I wanted those to be my main source for sales. January is when I made the official announcement (and yes this is important because not only will it keep you accountable to actually go through with publishing, it also gets people excited for your upcoming book. Yes, it can be scary to put yourself out there, but you WANT everyone to get excited about your book long before you publish it.)
I spent the first month focusing on my Instagram account and learning all I could about how to grow it through the year. January was when I dragged out my notebook and came up with my (very detailed) marketing plan. Obviously my marketing plan changed a lot throughout the year as I learned new things, but having a marketing plan early to set yourself up for later is key.
Basically, January was the month of planning.
February: I spent most of February rewriting my book
Now that I’d announced it, it was like my perspective on my story had changed. Suddenly I realized that certain little things that I originally didn’t care about in my manuscript now bothered me, because I knew everyone was going to see it. In the future, this would be the point I would start sending my book to Beta Readers, but I spent a lot of time reworking the story myself before I was ready to give it to others to read.
March: Beta Readers–Round 1
It was scary, but I sent my book off to about 6 beta readers. I think 3 of them got back to me with notes. This took around a month for me to get all the notes back, so in the meantime while I was waiting, I focused on growing my social accounts, marketing, and starting to design my cover. At this point, if I would have known then what I know now, I would have also started to get ARC sign ups, and plan a book tour or at least get a few podcasts and Bookstagrammers lined up, but I didn’t know any better.
Fun side note: March was when Ontario officially shut down schools due to the Covid 19 pandemic, so my three little kids were home starting this month.
April: I revised my manuscript based on my Beta Readers’ Notes
I spent about two weeks gutting my story, and basically rewriting almost all it. Then I started seeking out more Beta Readers to test out the new version.
I also purchased the copyright for my book this month, and I got my ISBN numbers for the two formats I planned to publish my book in (Ebook and Paperback.)
All the while, I was growing my social media platforms (You can assume I was doing this every month.)
May: Beta Readers–Round 2 and Rewrite
I sent out my book to another 4 Beta Readers to get their feedback on my newest version (not the same Beta Readers as before.) I think I only heard back from 1 of them this time around, but she gave me lots of notes and surprisingly she took less time than the original Beta Readers who took about a month. So I spent the rest of May starting to rewrite parts of the book again.
In general, I would give every round of Beta Readers a month on your timeline (it’s better to have more time than to be pressed for time and having to rush.) I’d also give yourself a month to rewrite your book in between every stage of Beta Readers. If you want to do two rounds of Betas, you will typically need to schedule four months into your publishing schedule specifically for Beta Readers.
Also, this month I missed my deadline to give my book to my editor (the first editor I had booked.) So, I lost my spot and had to find another one.
June: Finish Rewriting and Send to New Editor
Most of June was spent Rewriting my book based on the feedback from my final round of Betas.
I was way behind on everything, but I sent the final manuscript to my editor. It took about a month for me to get it back.
Fun Note: If I would have known then what I know now, I would have put my ebook up for preorder this month (6 months in advance of the launch date.)
July: I Missed My Pre-Order Promise
Originally, I had planned a big “Christmas in July” campaign and I had told everyone that my book would be available for preorder in July. Unfortunately, I didn’t leave myself enough time for this to happen. I spent most of July going through the editor’s notes and fixing all the mistakes in my manuscript.
I also formatted my books (ebook and paperback separately) in July and into the first week of August (this took me about two weeks because I was learning how to do it. Even if you hire someone else to do this for you, keep in mind they will need TIME to do it.)
August: My Mad Scramble
First I had to finish formatting my books. I was up until midnight doing this for almost a week (but now that I know how to do it, it takes me only a few days for current books).
Next, I began uploading my ebook and paperback titles onto Amazon and IngramSpark (this takes more time than you think because you have to approve their e-proof for ebooks and you have to approve your paperback on IngramSpark before you can put it up for preorder. You don’t want to approve it until you’ve ordered a physical proof, which takes about 2-3 weeks to ship to Canada from the US (or more depending on when IngramSpark’s “printing day” is), so the publishing process was going on over the next few months.)
When the paperback proof finally showed up, the book didn’t look great (I was still learning to understand the paperback fit) and I had to redo the cover and reorder proofs. So, that’s was another several weeks I had to wait for a new proof from IngramSpark.
September: I Put my Book Up for Preorder
FINALLY. It was only a few months late. With me waiting for my proofs, it was closer to the end of September that my book became available. Also, it can take up to a week (or more) for a title to appear on the major book retailer websites (like Indigo in Canada) and I didn’t realize that. I had hoped to have my book available to my Canadian friends and family earlier this month, but the actual “publishing” part takes time too. Also, I ran into complications trying to get the IngramSpark title onto Amazon–it’s a long story but I spent most of this month on the phone with Amazon KDP, and IngramSpark trying to get this sorted out. Like everything else, it just took tons of time.
Also, I sent out the ARCs this month to start building up reviews on Goodreads. Many of my ARC readers also posted their reviews on Instagram to drive preorders up.
October: Advertising Like Crazy
Since I got so far behind with the editing, formatting, and publishing, I hadn’t spent nearly the amount of time I’d hoped on marketing. However, BECAUSE I HAD A PLAN WAY IN ADVANCE, my marketing was way more successful. I had already contacted plenty of people about sharing about my book on their social media, and I had already done the labour of cold calling Bookstagrammers and Book Bloggers, and building up my own social platforms starting back in January. I did what I called a “Hail Mary” book blast across social media. I got everyone to post about it at the same time during the week leading up to the book launch, and because I’d been connecting with readers all year on Instagram and giving them updates, there was a handful of book lovers that were eagerly awaiting my book release.
So for the marketing side of things, October was lit.
November: Book Release
Apart from being so nervous that I could hardly think straight, this was a GREAT month. I was so glad I got those paperback preorders sorted out, because my paperback sailed to the #1 Best Selling spot in Christian Fiction on Amazon and I also hit the #1 Best Selling spot in Myth and Folktales for Young Adults, and I was hovering at the top of a handful of other Best Seller Lists on Amazon as well.
Having a nice, long timeline plan is the way to go. Give yourself more time than you think for everything. If you’re unsure how long something takes, give yourself an extra week for it when you’re planning out your “Book Publishing” schedule.
Your Marketing Plan (and why it’s the most important thing on your list)
I’ve seen way too many writers out there spend years writing their beautiful novel, pouring their heart and soul into it, and then publish their book without a marketing plan. It always pains me because I know they’re probably only getting a few book sales on publishing day and may not get many more after that. What many first-time authors don’t realize, is that selling lots of books is totally possible.
When I set out to publish my debut book, I spent a solid year focusing on my marketing plan before I ever hit the “publish” button. I spent several years before that doing research and compiling a list of ideas of how I could spread the word “when I would publish.” My success on publishing day was completely because of my marketing plan.
What is a marketing plan? Well, it’s a written-down timeline and implementation strategy for your book launch. In easy-speak, it’s a list of everything you want to do to tell the world about your book, and what you have to do ahead of time to in order to make all those ideas happen.
If you sit down with a pen and a notebook and try to be creative, I guarantee you’ll be able to come up with a few ideas on how to share about your book. Talking about it with the people in your life is great, but if you’re not letting the rest of the world know, your sales will be limited to your immediate circle when you go to publish.
The reason you want to put in a lot of the work ahead of time and start to generate buzz about your upcoming book, is because in order to hit a bestsellers list (if that’s something you want to try to do) you need to have a certain number of sales on launch day/launch week. I researched this whole process a year in advance and began to build up my author profile on Instagram so that I could spread the word through the #bookstagram community. It worked, too–I got plenty of sales through people seeing my book on Instagram alone.
It shouldn’t be daunting or confusing to build a marketing plan. Remember, most of your ideas will change over time. Originally, my plan was to transform my publishing company into a “Pampered Chef” style sales plan with online Facebook “parties” where I would feature my book. I figured out pretty quickly how much work it would involve to make that happen–and how difficult it would be to keep it going. But that was one of my original ideas that I’d laid out a plan for, before I scrapped it.
Here’s a very basic example of a marketing plan for one of your social media channels if your were publishing a book in September: (this is just for social media–you should make a “how to make this happen” plan for every idea you have and want to incorporate. Also-this isn’t necessarily the plan I would use, haha, my social media plans tend to be much more detailed than this since I often plan my content ahead of time as well.)
Jan-Feb: Focus on growing my audience on social media. Talk about the writing process. Start to build relationships with other authors. (Seriously, the indie author community on Instagram is exceptional–find them. They will be in your corner.) Build my online tribe.
March: Put my book up for preorder. Re-introduce myself and my book on social media (to all new followers and connections.) Tell everyone my book is up for preorder at the early bird/discounted price to get some early interest/preorders. Cross-promote with other authors (trade “shares”–they share about your book on their social media, you share about their book on yours.)
April: Start to pitch my book and invite ARC readers along on my journey (ARC readers are people who agree to read your book before it’s published and leave reviews about it on Goodreads/Amazon/or social media.) ARC readers will build up hype early, and through these early reviews, other readers will learn about your book (and preorder it.)
May: Work on building authentic relationships with my followers, share teasers about the book, and spend some time creating eye-catching graphics that I’ll be sharing across social media in the final months (and that I can give to my ARC readers to share on their social media.)
June-August: Raise preorder price. Hardcore publicity to drive up preorders. Send book to ARC readers. (Basically set yourself up to have your book blast across many people’s social media channels all at once so that readers are seeing it frequently. Statistically, if someone sees your book seven times, the chances of them buying it skyrocket.) Share ARC reader reviews. Maybe run a book-related contest on social media to get readers’ attention.
September: Have a book launch event online. Ask your ARC readers to share about your book launch on launch day. Ask your author/writer connections to share about your book launch on launch day. This is your last-minute book blast.
This is just one process, and social media is just one channel for marketing. Even if you only did something similar to this on social media leading up to your book launch, it would make a considerable difference in your sales during launch week.
But at the end of the day, the important thing to remember is that you’ve written and published a book, and that’s amazing. Sales doesn’t equal success. I would always recommend having a marketing plan for your book launch, but sometimes, just getting to the finish line your own way is worthy of a good cheer.
If you don’t have a marketing plan for your book yet, grab a piece of paper and a fancy pen and begin jotting down every idea you can think of where you can show your book to potential customers (online, and in person.) Consider contests, cross-promoting, building a new community, running Ads, giving away bookmarks, etc. Then, write down exactly how to make each one of those things happen. (Another example: If you decide to visit a local in-person book club and want to give out free bookmarks with your website on it, research which printing sites you can afford, how to design a bookmark, and the time it takes to get printed and shipped. Every detail should be laid out so that you can add this as one of your marketing strategies to your overall timeline.)
If through this process you realize one idea is going to be too much work with minimal results, scrap it and move on to the next idea. This is a learning process, and you’ll be constantly tweaking your plans as you go throughout the year. So it doesn’t have to be perfect right from the start!
Building Your Book Launch Team
Not all authors do this for book launches, but I always do. It’s an easy way to gain some traction for your book launch, and if you plan this out far enough ahead of time, you can create quite the impact.
I’ve heard this idea called all sorts of things: a “book blast” or a “book tour” or something else, but the idea is that you recruit people to help spread the word about your book on launch day. The people who sign up will share about your book on social media. (You may have to provide them with a google form to fill out, or a web/website form, or just keep a Word file on your computer with a list of all the names and email addresses of everyone who agrees.)
You can recruit people to join your book launch team with incentives such as contests/draws, or giving all who sign up a free ebook (this only works in your favour because some of them may leave reviews after they’ve read that free ebook) or similar freebies. Asking people to support your book can be hard, but if the readers involved are getting something for free out of it, then everyone wins.
When you invite someone to be a part of your book launch team, you can ask them after the launch if they’d like to permanently join your “street team” (yes, this is different than a “single book launch team”) and the more people you accumulate on your street team, the better your book launches will be in the future, and you won’t have to look as far to find people interested in helping spread the word about your books. (You can set up a permanent “street team” group on Facebook, or just keep track in your own files and send out an email when you have a new book launch coming up to see if they’d like to participate again.)
A few days before your book launch, make some really nice graphics with your book cover (or get someone to make some for you if you aren’t artistically inclined) and send a few out to your book launch team, plus the links of where to buy your book. Remind them to post on book launch day. Then, sit back and watch as these amazing readers begin to share about your book online.
(One important thing to note: Unfortunately many people forget to post, or ghost you after they’ve signed up. It’s a common occurrence, so don’t feel down if only a few of the people who signed up actually share on social media about your book. For my past book launches, I’ve typically had about 1/3 of the people who signed up actually post on launch day, so keep those numbers in mind while building your team. If you want to see 10 people post about your book on launch day, try to get 30-40 people signed up to post. And don’t worry about the ones who don’t!)
Utilizing “Bookstagram” and “Booktok”
This section is specifically for Instagram and TikTok. On Instagram, there’s this lovely little community called “Bookstagrammers” who are basically just people from all around the world who adore books and like to talk about them on Instagram. They often use the hashtag #bookstagram and many of them will post about what they’re reading, they’ll post their reviews of books, and sometimes there are a few lovely ones out there who will help you share about your books as well. One of the best things you can do for the success of your books is to get to know this community. They’re a fun bunch, and often they’re on board to share about your book on their Instagram page in exchange for you giving them a free ebook copy. This is a no brainer–Don’t believe the lie that you shouldn’t give your book away for free. Be generous! It will get you way further in the end. Keep in mind that every time a Bookstagrammer shares about your book on social media, that’s hundreds of their followers who see them recommending your book and are now interested in it.
This is very similar to “Booktokkers” on TikTok. Booktokkers are also book enthusiasts who share about their favourite books and what they’re reading on TikTok. I’ve found that many of the readers on TikTok are generally a younger audience than what you’ll see on Instagram (generally, not always) and they’re especially a younger audience than the readers you’ll find on Facebook. If you have a book that’s written for a teen audience (YA, Upper Middle Grade, etc.) TikTok might be a good place for you to meet your readers. Keep in mind that TikTok takes a little more of a commitment than some other social platforms, because you’re making videos. It is easy to use and can be effective if you can get to know some Booktokkers and offer them a free ebook in exchange for posting a review on their TikTok.
In addition to cultivating relationships on these platforms and inviting them them to join your street team, you can also reach potential new readers just by using the hashtag #bookstagram on Instagram to join the book conversations, and #booktok on TikTok. You’d be surprised how many readers are randomly flipping through those hashtags. But keep in mind that since they’re wildly popular hashtags, your content will be lost to the sea of other posts quickly. So if you make a post/video, readers likely won’t see it from visiting the hashtag a few hours later. (So be sure to use plenty of other relevant, and less popular hashtags as well to extend the life of your post.)
Just in general, when posting on Instagram and TikTok, I suggest engaging with everyone who comments and making sure people see that you’re present (instead of just dropping multiple posts about your book and never participating in conversations.)
The last tip I have is to consider building a list of Bookstagrammers and Booktokkers who are willing to share about your book before the launch. So, a month before your book launch (or more, if you’re like me), you can begin asking these Bookstagrammers and Booktokkers if they would be willing to post about your book in exchange for a free ebook. It can be as easy as sending them a message and saying, “I have X number of ebooks that I’m giving out for free to Bookstagrammers who are willing to post their review on their Instagram. Would you like one?” Tell them the launch date so they can mark it in their calendar, send them the free ebook, and then send a reminder to everyone on your list the day before your book launch so they don’t forget to post about it.
What it Means to be an “Authorpreneur”
I’ll keep it plain and simple. “Authorpreneur” is a term that some authors like to use to identify each other as “Entrepreneur/Career/Life-Is-All-About-Publishing-Books Authors” who understand that simply writing a book is an entirely different thing than running an entire book business, or as I like to say “building a book empire.” Plain and simple, it’s the difference between someone who wrote a book, and someone who wants to build a career out of writing books.
There is no right or wrong way to be an author. Some people only want to write books on the side, or publish a single book about their life or something they experienced–and that is awesome. Every book published is a massive accomplishment. (Be proud of it!)
But then there are some of us who are determined to be authors as our jobs, always and forever. Yes, the enthusiasm might be a bit much for the average book-writer, but it’s how some of us think. Personally, I was created for this. I knew it when I was fifteen years old, and I know it even more so now.
Most writers know exactly which side they’re on right away; casual or extreme. And both sides are, yes, you guessed it–awesome.
Running a business takes work, and typically when you’re starting any kind of business, you have to embrace that you likely won’t see a profit in the first two years. The same goes for running a “book business”. Being an entrepreneur isn’t for everyone. But if you have a dream simmering inside of you to build an empire out of books, book-brick by book-brick, and to create a career out of telling stories, and to run a business centered around those books, you might just be a few heartbeats away from becoming an Authorpreneur.
Registering Your Business/Publishing Imprint
An “Imprint” is something some self-publishing authors use. This is their “publisher” which is really just a registered business that they’ve set up with the Canadian Government. So when you use an imprint/registered business to publish your books, your company will receive the paycheck, instead of you as an individual.
You do not need your own publishing imprint/registered business to be able to self-publish on Amazon. However, you do need a registered business/imprint to publish on sites like IngramSpark, because IngramSpark won’t pay an individual, they’ll only pay a publisher.
If you plan to publish on IngramSpark, you’ll need to register a business with the Canadian Government, pick an imprint name (mine is Winter Publishing House, for example) and you’ll then need to set up a separate business bank account for your paychecks from IngramSpark to go to. (Certain self-pub sites might require you to have a US bank account as well.)
So you need to decide where you want to publish your books, and whether or not you want to publish them as an “individual” or as a “publisher.” It can take some work to set all of this up, but you’ll have more opportunities for your author career/book business if you do. This is the time to decide what you want to do with your books going forward, because if you only want to publish a book here and there as a hobby, you’re probably better off to publish as an individual on Amazon only. But if you want to go beyond publishing books and grow a full-time career around one of the book-related branches of business out there for additional income, you’re better off to register a business.
I use my business to publish on all the self-publishing sites, so all of my profits from book sales go directly to my Winter Publishing House bank account. As a small business owner, I’ve found there are more opportunities to expand my “book business” beyond just publishing books, and there are certain marketing advantages to having a “company” advocating for your books, rather than you as an individual. I have plans to expand my company in a number of different avenues.
Register your Business with the Canadian Government
How to Purchase the Copyright for Your Book
Technically, you don’t need to copyright your book in Canada, and that’s because as soon as you write it, it’s your intellectual property, legally. You should write a copyright page at the front of your book, and include your name/pen name and the copyright symbol, and the year it was/is going to be published.
However. Registering the copyright of your book provides an additional shield of protection around your work. If you register your copyright with the LAC/Canadian Government, you can prove that you own the copyright of your book if it’s stolen. Unfortunately there are some vultures out there who steal other people’s work and try to claim that it’s their own. The best way to protect your work is to purchase the copyright so that there’s evidence of your ownership.
When you register the copyright, you’ll be asked to mail a physical copy of your book to the Library Archives of Canada for their records as soon as it’s published.
Here is a guide to copyright in Canada
Register your copyright with the Canadian Government
Free Printable Builders